

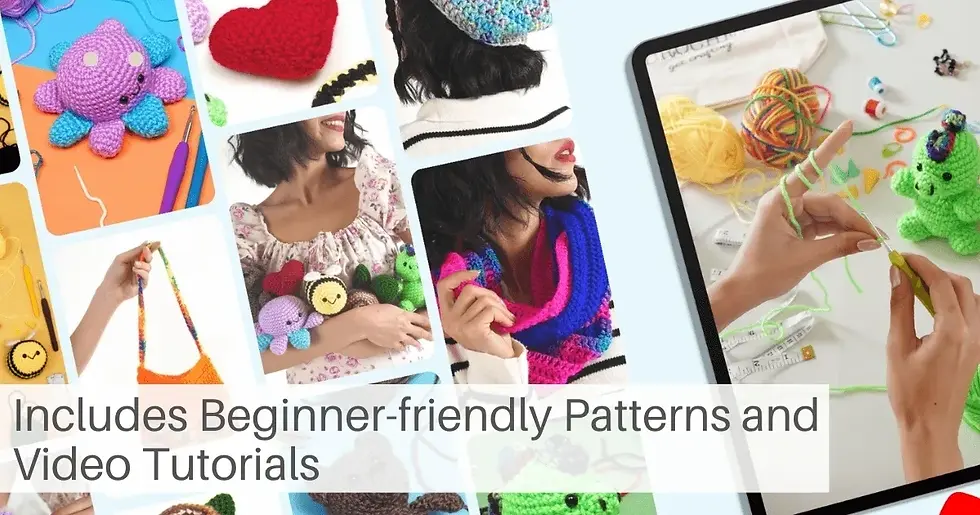
Crochet enthusiasts know that weaving in ends is a crucial step towards completing their masterpiece, whether it's a cozy blanket or an adorable amigurumi.
Yet, this seemingly simple task can feel like a chore if not done correctly.
Key Takeaways
Weaving in ends is a crucial step in finishing any crochet project to maintain integrity and enhance the overall appearance.
Techniques for weaving in ends include using a tapestry needle, working the end into stitches, hiding it with crochet stitches, or using a crochet hook.
Tips for successfully weaving in ends include keeping them short, weaving them as you go, using yarn needles with large eyes, leaving long tails for easier weaving-in, and matching thread color closely.
Common mistakes to avoid when weaving in ends are not doing it securely enough, cutting too short or tight/loose, and skipping this process altogether.
The Importance Of Weaving In Ends In Crochet
Weaving in ends is a crucial step in finishing any crochet project, as it not only maintains the integrity of your work but also enhances its overall appearance.
Properly securing these yarn ends ensures your finished creation won't unravel or come undone, ultimately leading to disappointment and frustration after investing time and effort into making something beautiful.
Mastering various weaving techniques can significantly improve the quality of your crochet projects while also saving you from potential repair work down the road.
For instance, if you are working on a beloved handmade gift for someone special or an heirloom piece that should last through generations, it's essential to know how to weave in ends securely and effectively.
By doing so, you avoid loose ends peeking out from between stitches or fraying over time – common issues that could detract from an otherwise perfect piece.
Techniques For Weaving In Ends In Crochet
Learn how to use a tapestry needle, work the end into stitches, hide the end with crochet stitches, and even use a crochet hook for weaving in ends in crochet projects.
Using A Tapestry Needle
A tapestry needle is a useful tool for weaving in ends in crochet. Here are the steps to do it properly:
Thread the end of the yarn through the eye of the tapestry needle.
Starting at the base of the last stitch, weave the needle over and under several stitches as you work your way up toward the beginning of where you want to weave in the tail.
Once you reach that point, reverse direction and weave back down toward where you started.
Weave through 4-5 stitches before cutting off any excess yarn.
Using a tapestry needle gives a neat finish to your crochet project and helps to ensure that ends won't come loose over time.
Make sure to keep your weaving tension consistent and not too tight or too loose, as either can create unwanted puckering or distortion in your finished piece.

Working The End Into Stitches
To weave in ends using the "working the end into stitches" method, follow these steps:
Thread a tapestry needle with the tail of yarn.
Insert the needle under several stitches on the back of your crochet work.
Make sure to avoid any stitches that will be visible from the right side of your project.
Pull the yarn through and repeat this step by running your needle under several more stitches in a zig-zag pattern.
Cut off any excess yarn, leaving a short tail.
This technique is great for hiding ends on projects where there is not much texture or variation in stitch design, such as blankets or scarves.
It also works particularly well for weaving in ends when changing colors since it's possible to hide tails in between rows of stitches without interrupting the visual flow of the new color change.
Remember to always weave in ends securely so they don't come undone after washing or use!

Hiding The End With Crochet Stitches
If you prefer a more seamless finish to your crochet projects, you can also hide the end by weaving it through nearby stitches. Follow these steps to effectively hide the end with crochet stitches:
Start by threading the end onto a tapestry needle.
Identify a nearby stitch that is the same color as your yarn and insert the needle under both loops of that stitch.
Then bring the needle back up through the same stitch, weaving in the opposite direction.
Repeat this process, moving on to adjacent stitches until you have woven in enough of the end to be confident that it won't come undone.
Finally, trim off any excess yarn close to where you wove in your ends, being careful not to cut into your stitches.
Hiding your ends with crochet stitches can create a cleaner look for your finished project but make sure you do it properly so that it doesn't come undone easily.
Using A Crochet Hook
Another useful tool for weaving in ends is a crochet hook. Here are the steps for using a crochet hook to weave in ends:
First, insert the tail of the yarn onto the crochet hook.
Next, use the hook to weave the end under several stitches in your work.
Pull the tail through and repeat this process a few times to ensure it's secure.
Once you've woven in the end, snip off any excess yarn with scissors.
Using a crochet hook can be especially helpful when trying to weave in shorter ends or when working with thicker yarn that may not fit easily through a tapestry needle.
Remember to always test your weaving technique on a scrap piece of material first before moving on to your actual project so that you can avoid any mistakes and achieve a clean finish.

Tips For Successfully Weaving In End
Keeping The End Short
When weaving in ends in crochet, it's important to keep the end short. If the tail is too long, it can create bulk and make the finished project look messy.
A good rule of thumb is to leave a tail that's about three or four inches long after cutting the yarn.
Another benefit of keeping the end short is that it reduces the risk of snagging or unraveling over time.
Shorter tails are less likely to get caught on something or pulled out accidentally.
When it comes to projects with frequent color changes, like blankets or amigurumi toys, leaving shorter tails can also save you time and hassle in the long run.
Overall, keeping your yarn tails short and tidy while weaving them into your crochet project will help ensure a polished and professional-looking finish every time.

Weaving In Ends As You Go
Weaving in ends as you go is a great way to ensure that your crochet project stays neat and tidy.
Instead of waiting until the end to weave in all of your tails, you can work them in as you switch colors or finish off a section.
To weave in ends as you go, simply hold the tail against your work and continue crocheting over it for a few stitches.
Then, use a tapestry needle to weave the tail back through those same stitches before trimming it short.
This technique works well when switching between colors or starting new yarn balls since you can hide the tails seamlessly within your stitches.

Using A Yarn Needle With A Large Eye
Another useful technique to weave in ends in crochet is by using a yarn needle with a large eye.
This type of needle allows for easy threading of the yarn, especially when dealing with thicker or bulkier yarns.
To use this method, simply thread the end through the needle and weave it back and forth through several stitches while making sure to keep it hidden within the fibers of the project.
It's important to note that when weaving in ends, you should always avoid pulling too tightly as this can distort your work.
Additionally, matching the color of your thread closely to your project will ensure that any stray bits won't be noticeable once woven into place.

Leaving Long Tails For Easier Weaving In
Leaving long tails of yarn can make weaving in ends much easier.
When starting a new color or skein of yarn, leave a tail that's at least 6 inches long to make sure there's enough length to weave in securely.
When weaving in the end, fold the tail back on itself and weave it tightly through several rows of stitches.
This method ensures that even if some tension is applied to the finished project, the tail won't come loose.
It also helps to match the thread color closely so that any accidental peeks of the end aren't noticeable.

Matching Thread Color
It's important to choose a matching thread color when weaving in ends in crochet.
This ensures that the woven-in end blends well with the rest of the project and doesn't create an eyesore.
If you're unsure about which color to use, try selecting a neutral shade that complements your yarn or opts for a color that matches one of the dominant shades in your project.
Matching thread color is an easy way to elevate the finished look of your project and make sure that all your hard work doesn't go to waste.
Common Mistakes To Avoid
Avoid skipping weaving in the ends, not weaving them in securely, weaving them too tightly or loosely, cutting them too short, or using the wrong thread color.
Skipping Weaving In Ends
Skipping the process of weaving in ends can lead to a messy and unprofessional-looking finished project.
It may be tempting to simply cut the yarn and move on, especially if you're in a rush or have many tails to weave in.
However, leaving those ends loose can cause knots, tangles, and unraveling over time.
An example: Imagine crocheting a beautiful baby blanket as a gift and not taking the time to weave in all the ends properly.
When it's gifted to the new mother, she sees that it is full of little dangling threads that could potentially pose a choking hazard or become knotted with use.

Not Weaving In Ends Securely
One of the most common mistakes when weaving in ends is not securing them properly. If the tail is not weaved in securely, it may come undone and ruin the finished project.
To avoid this, make sure to weave the end in multiple directions and run it under several stitches before cutting it off.
It's also helpful to leave slightly longer tails than you think you need, so there's more wiggle room for weaving in and securing the ends without compromising their stability.
Weaving In Ends Too Tightly Or Too Loosely
When it comes to weaving in ends in crochet, it's important to strike the right balance between too tight and too loose.
If you weave in your ends too tightly, you risk creating a puckered or distorted section of your project.
This can be especially problematic when working with delicate yarns or lighter weight fabrics.
To ensure that your woven-in ends are just right, it's best to test the tension by gently tugging on them once they're woven in.
If they're overly tight and difficult to remove at this point, consider redoing them with a slightly looser tension.
Remember: properly weaving in your ends is an essential part of maintaining the integrity and visual appeal of your finished crochet projects.

Cutting The End Too Short
One common mistake when weaving in ends in crochet is cutting the end too short.
This can make it difficult to weave the tail into the stitches without it slipping out or becoming undone over time.
To avoid this mistake, always leave a tail that's long enough to weave back and forth at least two or three times through several rows of stitches.
A good rule of thumb is to leave a tail that's about six inches long, depending on the thickness of your yarn and how tightly you've crocheted.
Using The Wrong Thread Color
Using the wrong thread color can be a common mistake when weaving in ends in crochet.
It's essential to choose a matching thread color or one that blends seamlessly with the project's yarn.
For example, if you're working on a multicolored blanket and weave in ends using a bright red thread instead of one that matches the background yarn, those red tails will stand out and distract from the design.
Therefore, it's crucial to choose suitable colors that complement your project.

Conclusion
In conclusion, mastering the art of weaving in ends is crucial for any crochet project.
By using a tapestry needle, working the end into stitches, hiding it with crochet stitches, or even a crochet hook - there are many techniques available to perfectly weave in those pesky yarn tails.
Remembering tips such as keeping the tail short and matching thread color can also make all the difference.
However, it's important to avoid common mistakes like cutting the end too short or not weaving it in securely.

FAQ
Why is it important to weave in ends when crocheting?
Weaving in ends when crocheting ensures that the finished piece looks neat and polished, while also preventing any loose yarn from unraveling over time.
What tools do I need to weave in ends during crochet projects?
All you'll really need is a tapestry needle with a large enough eye to thread your yarn through, scissors or snips for trimming excess material, and of course, your crochet project!
How can I effectively weave in my ends without creating bulk or disrupting the stitches?
A good technique for weaving in your crochet ends involves threading the tail of your yarn through several stitches on the reverse side of your work before trimming off any excess length close to where it was woven into place.
When should I start weaving in my ends during a crochet project?
It's best practice to weave in tails as soon as possible after completing each section (e.g., color changes, rows) so there are only minimal tails left at the end of the project. This will help save time and effort while ensuring longevity and durability over time – especially if you're planning on giving or selling items made with your skills!
Comments